
Printing Photos from a Computer
This section describes how to print photos with My Image Garden.
-
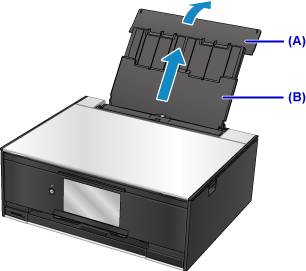
Open the rear tray cover (A) and then pull up the paper support (B).
-
Open the feed slot cover (C).

-
Load paper vertically WITH THE PRINT SIDE FACING UP.
-
Align the paper guides (D) with the paper width.

-
Close the feed slot cover (E) gently.

After closing the feed slot cover, the paper information registration screen for the rear tray is displayed on the touch screen.
-
Select the size and type of the loaded paper in the rear tray at Page size and Type, and then select Register.

-
Click the My Image Garden icon (F) in Quick Menu.
The Guide Menu screen is displayed.

 Note
Note- The number and types of icons displayed vary depending on your region, the registered printer/scanner and the installed applications.
-
Click the Photo Print icon (G).

-
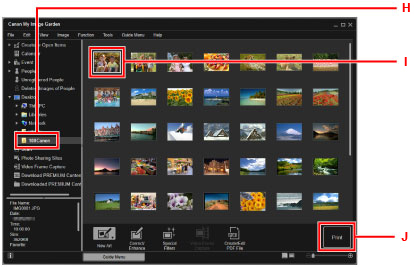
Click the folder (H) with photos you want to print.
-
Click the photos (I) you want to print.
For Windows:
To select two or more photos at a time, click photos while pressing the Ctrl key.
For Mac OS:
To select two or more photos at a time, click photos while pressing the command key.
-
Click Print (J).
-
Specify the number of copies, your machine name, media type, etc. (K).
-
Click Print (L).
For Mac OS:
Click OK when the confirmation message appears, then click Print.

The operation panel is opened and the paper output tray is pulled out automatically, then printing will start.
![]() Note
Note
-
My Image Garden lets you use images on your computer, such as photos taken with a digital camera, in a number of ways.
-
For Windows:
-
For Mac OS:
-
